Do you ever spare a moment by thinking about the toil and hard work which your feet have to endure by their ceaseless walking, running and jumping? You always take care of your skin, hair and even hands, but when it comes to taking care of your legs and feet, you simply ignore, right?
But taking care of feet is a matter of utmost importance because healthy feet are not only a sign of health but can also take your overall appearance to its zenith.
Now probably you are wondering about how to take care of your feet, the answer of which is by going through a systematic pedicure. Yes! To proffer that extra care and pampering, a pedicure is simply impeccable!
But I know you are thinking that for doing that effective and luxurious pedicure you have to rush into a salon, right? And you don’t want to invest those extra bucks in doing a pedicure in a salon.
No worries, you have option there as you don’t have to go to a salon for your pedicure because you can do it at your home by using natural ingredients.
Sounds too good to be true, isn’t it? It is absolutely true and you can achieve those healthy, glowing feet in the comfort of your home by using simple and natural ingredients.
Doing pedicure at home is amazing as it is on the one hand refreshing and on the other hand transforms the appearances of your feet. Before jumping at the step-by-step process of pedicure, just let me tell you what actually a pedicure is:
Let’s Understand What Pedicure Is
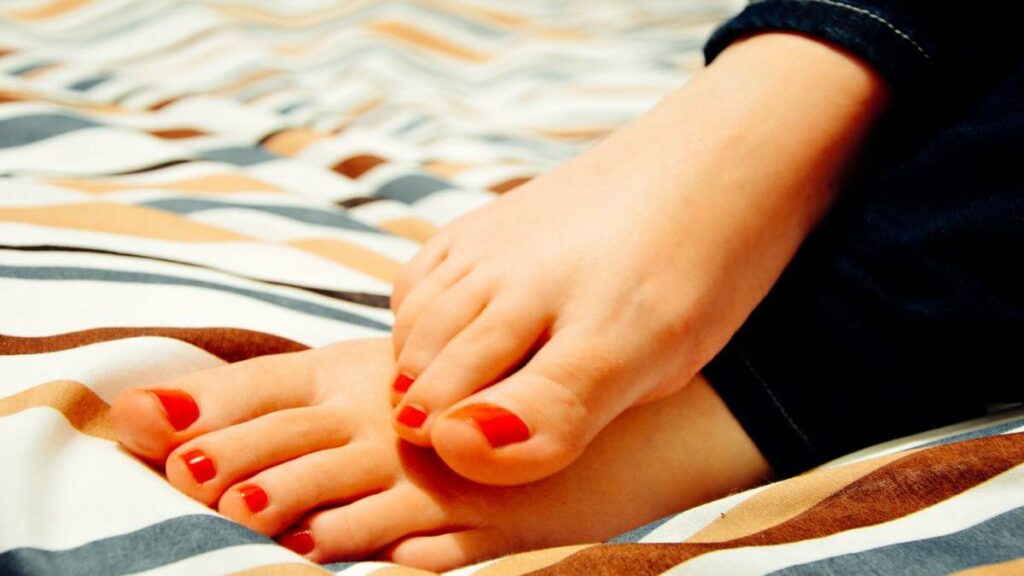
Pedicure is a treatment of feet and toenails which has therapeutic and cosmetic purposes. This extremely popular cosmetic treatment ensures radiant and glowing feet with neat and clean toenails.
A pedicure takes care of toenails, besides it abolishes all the dead skin cells. The knee-length skin care including massage, granular exfoliation, moisturizing is provided by pedicure.
Types And Variations Of Pedicure:
There are numerous variations of pedicure, the most common among them are:
- Regular pedicure: This is the most common pedicure which includes nail clipping, nail shaping, foot massage, foot soaking, foot scrubbing, moisturizing and applying nail polish.
- Spa pedicure: This encompasses a regular pedicure and paraffin dip, masks or seaweed treatment.
- Waterless pedicure: It includes steps like cuticle cleaning, dead cells removing, moisturizing, massaging, and nail polishing except soaking your feet in water. And all the above steps are done by using an electric file.
- Paraffin pedicure: Besides including all the steps of a regular pedicure paraffin pedicure consists of a paraffin wax that nourishes as well as moisturizes feet.
- Mini pedicure: It is generally meant for well-maintained feet and legs. It comprises a quick soak, nail clipping, shaping and applying nail polishes.
Benefits:
Regular and consistent pedicure has multiple benefits such as
- Transforms appearance: Pedicure vouchsafes you nice-groomed and polished toes that are not only nice but transfigures your overall appearance by making you feel svelte and sexy while wearing open-toe shoes or sandals.
- Increases blood flow: Another advantage of getting a pedicure is that it augments blood and lymph flow that in return helps to eliminate toxins from your body.
- Defends nails against bacterial infection: Fungal infection is very common for toenails as these always get exposed to moisture, dirt and grime. A professional can easily detect these infections in the early stage and treats them accordingly. A regular pedicure helps to maintain the health of your toenails.
- Makes you feel relaxed: Pedicure includes massage of your legs and feet which is a great way for releasing tension and anxiety.
A step-by-step Process Of Doing Pedicure At Home
I know having acquainted with the multiple benefits of a pedicure, you are eagerly waiting to know the step-by-step process for doing a pedicure which, I can assure you, is extremely simple and you can easily do it whenever you feel. Now without further silly sally, let’s go through the step by step process of doing a pedicure:
The Things You Will Need:
For a complete pedicure you will need
- Warm water.
- Pumice stone.
- Nail file.
- Cotton pad.
- Olive oil.
- Lemon.
- Sugar.
- Honey.
- Almond paste.
- Salt.
- Shampoo.
- Clean towel.
- Cuticle pusher.
- Foot file/ cuticle pusher.
- Nail cutter.
- Nail paint remover. (Check Home Process Here)
- Nail polish of your choice. (Check Our Recommendation Here)
Steps:
1. Remove the remnants of old nail paint
Removing all those remnants of your old nail paint is the very first step of a pedicure. I know you are very much attached to your old nail polish, but girl removing that nail polish will bestow a whole new freshness.
To remove the old paint, take a cotton pad, dab some nail polish remover to that cotton pad and gently rub your toenails until the paint comes off. When the color is completely removed wash your feet off with normal water and pat it dry.
Check Also: How To Remove Nail Polish Without Remover (8 Alternatives)
2. Shape your nails
Next comes the shaping of your nails. While doing this, just be careful as the shape of your nails can determine the overall look of your feet. Take a nail cutter and carefully clip your nails. Be extremely careful while cutting the edges of your nails, otherwise, you can cut your nails too deep.
Now take a nail file and shape your nails by rubbing the rough edges of nails. While shaping up your nails only file them in a single direction because going forth and back can damage your nails.
3. Apply olive oil/coconut oil to your cuticles
Now it is turn to prepare your nails. Removing nail polish using a remover can make your nails dry and rough. To abolish that dryness what you have to do is to massage some olive/coconut oil to your cuticles. When the shaping and smoothening of your nails becomes complete take a few drops of warm olive oil or coconut oil and gently massage that to your nails.
Olive oil or coconut oil will not only nourish your nails but it will also restore the luminosity of your nails. Besides, it will address the dryness and roughness of your nails. The vitamin E in olive oil will deeply moisturize your nails and will promote new growth which will ensure stronger and longer nails.
Another advantage of using coconut oil in pedicure is that it helps to keep nail infections at bay. Nail polish removers tend to make your nails dry; hence it is highly recommended that you massage your cuticle by using olive or coconut oil.
4. Soak your feet and relax
Here comes the next step which is soaking feet in lukewarm water. It is the most relaxing step in a pedicure.
At first take lukewarm water in a tub, add some shampoo or shower gel to that water so that all the deposited dirt and grime of your feet can be eliminated instantly. Now you can add a few drops of essential oil, the aroma of which will enliven your mood and will give you a luxurious feeling.
Creak Also: 8 Best Anti Hair Fall Shampoos in India
For more refreshing feeling you can add some bath salt. Don’t forget to add some drops of vinegar which will soften your heels. To get that exact spa-like feeling you can also add some rose petals to that water. Now soak your feet for 15-20 minutes and relax.
5. Remove the dead skin cells
When you soak your feet for some time, your feet become soft and it becomes very easy to remove all those piled up dirt and dead skin cells.
Take one foot out of the water, pat it dry, use the cuticle pusher to push and trim your cuticles. Then use the pumice stone to rub your heel so that the dead skin cells can be abolished.
If your heels are cracked (check home remedies for cracked heels here) and your feet have calluses, use a corn cutter to remove the hardened skin from your feet. While doing this, don’t be too abrasive otherwise the skin in your feet can be damaged.
6. Exfoliate your feet
Exfoliation in a pedicure is a must-have step that will not only remove the remaining dirt but it will also make your feet radiant and glowing.
After rubbing your feet with a pumice stone, pat your feet dry and apply your homemade scrubber by mixing coconut oil, sugar, lemon juice, honey and essential oil.
Coconut oil will nourish your feet by providing the necessary nutrients. Honey will moisturize deeply and lemon juice will brighten and will make your toenails strong and healthy. Sugar being an amazing exfoliator will eliminate dead skin cells and grime leaving your feet more luminous and glowing.
Read Also: Top 20 Best Moisturizers in India For Dry Skin
- What you will need:
To make your own exfoliating scrubber you will need 2 tablespoons of extra virgin coconut oil, 5 teaspoons of brown sugar, 1 tablespoon of raw lemon juice, 1 tablespoon of honey and 4-5 drops of lavender oil or tea tree oil.
- What you have to do:
Mix all the above ingredients and make a thick paste. For more effective scrub you can also add grounded oatmeal or grounded walnut shells. Now apply the paste generously all over your heels, ankles, fingers and soles, massage or rub gently for 4-5 minutes and then wash off your feet or remove the paste using a washcloth.
7. Apply a foot mask
After scrubbing your feet, you have to apply some nourishing mask so that your feet look more rejuvenating and replenished.
- What you will need:
Garner 2 tablespoons of orange juice, 1 tablespoon of aloe vera gel, 1 tablespoon of tomato juice, 1 tablespoon of Fuller’s earth and 1 tablespoon of coffee.
- What you have to do:
Mix the ingredients well and apply the paste to your feet, ankles, toes, soles and fingers. Leave it undisturbed for 15-20 minutes and rinse your feet using water.
- What it will do:
Orange juice is stuffed with antioxidants which will restore the firmness and flexibility of your feet. Aloe vera gel will hydrate and moisturize your skin intensively, tomato juice will lighten pigmentation, fuller’s earth will restore the radiance and the brightness of your feet and coffee will reduce the appearance of cellulite and will calm your feet instantly.
8. Moisturizing
The next step of your home pedicure is moisturizing your feet. If you have cracked heels and dry feet try to use a deep moisturizer that will prevent your feet from cracking and drying.
- What you will need:
You will need 3 tablespoons of Shea butter, 1 tablespoon of almond oil, 2 tablespoons of coconut oil and 4-5 drops of lavender oil.
- What you have to do:
At first melt the Shea butter in a microwave and add the coconut oil and almond oil, stir them and let it cool for few seconds and then add the essential oil. Now take the mixture on your palms, and apply them generously to your entire feet.
9. Apply new nail paint
After applying the moisture, it’s turn to put on new nail polish so that your toenails look beautiful and attractive. To apply the nail polish perfectly, use a toe separator so that there is no chance of smudging your nail polish. You can also go with your favorite nail art to adorn your nails.
10. Ultimately the finishing touch
Now, girl you are almost done with your pedicure. To finish off the entire process just scrutinize whether or not you have smudged your nail polish. If yes, remove all the smudges using a nail polish remover and then apply a transparent coat on top of your nail polish which will make your nail polish shiner and will give you a glossy finish.
Points To Remember
- If you are suffering from chapped and cracked heels, scrub your feet with a loofah or a pumice stone at least twice a week to remove all the deposited dirt and grime from your feet.
- Paint your nails when you are done with your pedicure, but overusing nail paint will make your nails frail and brittle.
- If your nails are prone to nail infection always use tea tree essential oil as it has anti-bacterial properties. But if your infection is serious then you should consult a doctor.
- Don’t do a pedicure if you are suffering from severe wound or injuries.
Frequently Asked Questions (FAQs)
How often should I get a pedicure?
The ideal gap between two pedicures should be 4-6 weeks which is the most perfect gap to maintain the nail shape. Within this time frame, your nails and cuticles again start to grow dry, rough and jagged and the nail paint also starts to chip away. Maintaining this gap will make your feet healthy, sexy and radiant.
What can I use to soak my feet?
Soaking your feet is one of the most important and soothing steps in a pedicure. It enlivens your mood and leaves you feeling refreshed. For soaking your feed you can use the mixture of lukewarm water and shampoo. It will clean all the deposited debris from your feet. You can also soak your feet in milk which is an amazing ingredient for moisturizing and cleansing your feet.
Can pedicure remove the tan from my feet?
Yes, a pedicure is extremely effective for removing tan from your feet. For that, you have to use the proper ingredients. Make a mask by mixing aloe vera gel, tomato juice, raw lemon juice and fuller’s earth. After Scrubbing your feet apply the mixture to your feet and your tan will be removed in no time. As lemon has natural bleaching agents it works wonder in lightening pigmentation and removing tan.
You May Also Like:
- 4 Types Of Petticoat For Saree That Can Make Your Saree Look To Next Level
- 10 Experts’ Tips on How to Dress to Look Slim
- 11 Effective Home Remedies for Under Eye Wrinkles
- 10 Best Eye Creams for Dark Circles in India (That Actually Work!)
Conclusion
Hence girl, don’t neglect your feet, these deserve some pampering after the intensive work which they do each and every moment. And the best part is that you don’t even rush into a salon for getting a pedicure. By using simple and natural ingredients you can do an effective pedicure. So muster the above ingredients and get sexy, delicate feet in an instant.
Table of Contents
