The intense pollution and stress reflect on the inside as well as outside of our body. However, the first sign of these adverse effects can be noticed on the face. What can be better than to do a fruit facial at home and combat the fine lines, tanning, pigmentation, breakouts successfully!
Doing a facial periodically is a healthy habit. In fact, it is one of those skincare routines that is not mentioned, but necessary to fight subtle skin issues. The best that you can have is to do a fruit facial at your own place.
Fruits are not only easily available but also very effective for skin care. Some fruits have anti-tan properties, while others have antioxidants that help in lifting the face muscles. Nevertheless, a fruit facial is not only about rubbing the desired fruit on the skin.
There is indeed a definite process to follow while doing a fruit facial. Even, the type of fruit facial you are doing should be in accordance with your skin. The regime for fruit facial at home for oily skin is much different from that for dry skin. Furthermore, you have to follow the unavoidable 6-steps regime to get the results you want to see.
It is not that you cannot find a proper facial at your nearby salons. Parlors or salons have set-ups for all types of facial. For instance, you can get a gold, diamond, or platinum facial. Additionally, salons also keep the resource for a fruit facial kit or a herbal facial kit. However, amidst the present situation, it is really difficult to visit a parlor and get the services.
So, to maintain good skin and not to show the signs of pollution and stress on your face, here are some details on how to make a fruit facial at home. In the upcoming sections, we will discuss the 6-step guide for a fruit facial.
Doing a Fruit Facial At Home: Step-By-Step Guide
The 6 steps to do a perfect fruit facial at home are very essential to understand. Every step in the regime is unavoidable and obligatory.
Step-1: Cleansing Your Face
We all know that dirty skin is the home of germs and eventual breakouts. Therefore, before starting any facial cleansing is a must.
As we are here to discuss a facial with all-natural ingredients, we suggest you using raw milk as the cleanser. Milk is indeed a great cleanser. It removes the dirt and in addition, gives an instant glow on the face.
- Take a cotton ball and dip the same in cold raw milk.
- Gently, cleanse your face with the soaked ball in circular motions.
- Next, splash lukewarm water on your face and feel your glowing face.
Step-2: Exfoliating The Dead Skin
Milk can get rid of the dirt and extra filthiness from the face. However, it is not effective to remove the dead cells on the skin. For that, you need a natural homemade scrub to exfoliate the buildup of dead cells.
Nothing is better than oatmeal to act as an exfoliator. Oatmeal is granular and greatly serves the purpose of exfoliation.
- Make a paste of oatmeal and lemon peel powder in a 1:1 ratio. You can either use plain water or rose water.
- Alternatively, you can use dried lemon peels instead of lemon peel powder.
- Apply the DIY paste on the face and massage for 3-4 minutes in a gentle circular motion. Nevertheless, it is imperative that you use your fingers to do so. Do not use your palm as the excess pressure is not good for the skin.
Splash with lukewarm water and clean the excess paste and dead cells from the face.
“Yogurt is a great moisturizer. If you have comparatively drier skin, you can use oatmeal and yogurt paste as a scrubber. It will get rid of unwanted dead skin as well as keep it hydrated.“
Step-3: Skin Lightening
The word ‘bleaching the skin’ makes us feel deadly. Salons sometimes use chemicals for skin lightening or bleaching. However, things have changed over the year. In the present day, people are more conscious about skin lightening and do not go for the process of bleaching.
Nevertheless, skin lightening is essential because we need to remove the tan. Tanning is what we haven’t inherited. Therefore, this has to be removed. We can go for the purest and natural skin-lightening agent, the Honey.
Honey is an effective anti-tanning agent with antimicrobial properties. Additionally, the presence of antioxidants and anti-inflammatory properties balances the mild bleaching property of honey. Consequently, it is absolutely safe to use on the skin.
- Take one tablespoon of raw organic honey, like Nature’s Nectar Raw Organic Honey.
- Rub on the face evenly and keep it for 15 minutes.
- Then wash the face with clean water.
You can see the bleaching effect of honey on the skin.
Step-4: Unclogging The Pores
If you want an effective fruit facial at home, the most important step is to open up the skin pores. The pores are the place where the dirt and oil settle. As a result, the pores enlarge with time.
No other ingredient is functional here, except the steam. The only thing you need is a bowl of hot boiling water.
- Take the hot boiling water in a bowl.
- Cover your face and head with a towel.
- Keep your face close to the bowl so that the steam touches your face.
Be cautious about the corner of the bowl and hot water. Keep a safe distance so that you do not burn your hands or face.
Take the steam for 10 minutes approximately.
This step will also loosen the stubborn blackheads on your nose and your chin (if you have). Therefore, you can remove them using the Vega Black Head Remover tool.
In other words, you can consider facial steaming as a deep cleansing step. By opening the pores, Steam actually gets rid of the excess sebum and dead skin cells. Furthermore, the steam helps in improved blood circulation, skin hydration and reduces the chances of outbreaks.
If you find it difficult to take steam in this manner, you can also use a KWT Steamer which has a 3-in-1 function for the face, nose, and throat. However, if you want an upgraded steamer, you should go for HealthSense Nano-Cure Facial Ionic Steamer.
“Steaming can be accompanied by dried herbs like rosemary and chamomile or with essential oils (orange, Eucalyptus, Lavender, or Geranium). These will be added advantage for your glowing skin.“
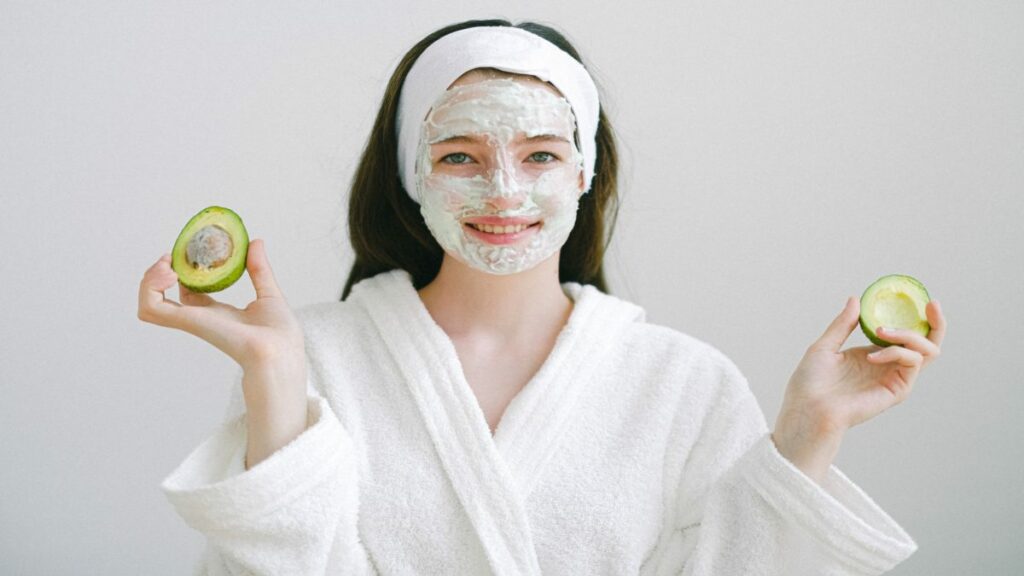
Step-5: Get a Fruit Facial at Home
This step has multiple options. There are many fruits that you can use for a fruit facial at home. Fruit selection depends largely on your skin type and your compatibility with fruits. If you are allergic to eating some fruits, we recommend not using that fruit on the skin also. Consequently, this may also have adverse effects on the skin.
Making a Fruit Facial Kit
You can make many fruit facial kits at the comfort of home with different fruits. For example, If you own dry skin you can go for a paste made of mashed banana and honey. On the contrary, if you have oily skin, berries and lemon juice are good to go. Furthermore, papaya and honey paste is good for combating fine lines and wrinkles. Whichever fruit is suitable for you, pick one and start the process of application.
- Apply the paste on the face and neck.
- Massage gently using your fingers.
- Remember to massage in upwards strokes. This will prevent your skin from sagging.
- Follow this process for another 10 minutes.
- Then leave the paste on the face and neck for 5 more minutes.
- Finally, clean your face with normal water.
“You can keep two slices of cucumber on your eyes during the last 5 minutes to get a soothing effect.“
Step-6: Nourishing and Moisturizing
After doing a fruit facial at home, we often put out the last step of moisturizing your mind. However, toning and moisturizing is an inescapable step of the whole process.
- Firstly, tone your face with a natural toner.
- Take out the juice of cucumber and mix 2-3 drops of lemon juice to it. If you are not comfortable with the astringent action of lemon, you can avoid it.
- Dab it thoroughly on your face and neck areas.
The following step is to make a paste of cucumber and massage it gently.
Leave it for 10 more minutes
With a splash of refreshing water wash your face and feel your supple skin.
“For dry skin, pair the cucumber paste with Aloe Vera, glycerine, or extra virgin coconut oil. However, if you have oily or combination types of skin, you can add few drops of essential oils like peppermint or rosemary.“
Do’s and Don’ts for Fruit Facial at Home
Doing a fruit facial at home is not a tiresome task. Furthermore, you have two other advantages. First, you do not have to rush to the parlor. Secondly, it is the most pocket-friendly way to have a facial. Although the natural ingredients are completely safe on the skin, there are certain things that you should do and few other things you should not do.
The Do’s:
- Select the right cleanser. Remember your skin type and make sure the cleanser is not making your face drier or oily as the case may be.
- Always pick fruits according to the nature of the skin. If you have acne breakouts, do not use a fruit that enhances oiliness. Besides, select the fruit that unclogs the pores and reduces breakouts.
- Use your fingertips for application and massage on the skin.
- Make use of plain and neutral water only post-facial if you feel a bit oily.
- Toning and moisturizing skin after facial is inevitable no matter what type of skin you have.
- Lastly, relax after the facial. It will allow the skin to breathe and take the positivity of the facial.
The Don’ts:
- Do not wash or rub your skin within two hours of facial.
- Avoid applying makeup right after the facial.
- Never skip the step that includes unclogging of pores. The skin will not respond to facial in such a case.
- Do not go for a fruit facial at home more than once a week.
- It is better not to go out in the sun immediately post-facial.
- Do not use tomatoes or lemons if you have dry skin.
- On the contrary, never use coconut oil or glycerine in fruit facial for oily skin.
- Lastly, your post-facial skin is very sensitive. Hence, avoid plucking your eyebrows at that time.
Frequently Asked Questions (FAQs)
Which fruits can I use for fruit facial?
The best fruits for a fruit facial at home include cucumber, papaya, apple, strawberry, grapes, banana, raspberry, and tomato. Additionally, do not forget to pair them up with ingredients like honey, yogurt, or milk to get effective results.
Which fruit facial kit is best to reduce wrinkles?
Fruits like papaya, cucumber, apple, and raspberries are high in antioxidants. Hence, they make the best fruit facial to reduce wrinkles. Also, do not forget to use yogurt in the kit because it can guard the skin against aging and damage due to free radicals.
How can I do oily face at home?
The best fruit facial for oily skin is a paste of berries like strawberry or raspberry and lemon juice. However, if you are not willing to use lemon or you do not have berries, try orange peel and yogurt mix to fight oily skin and keep the acne at bay.
What does Oatmeal do to your face?
Oatmeal is good as a food as well as for your face. It contains antioxidants and has anti-inflammatory properties. Therefore, along with removing the dead skin cells, it rejuvenates the skin. Besides, it soaks the excess sebum, dirt and unclogs the pores. Hence, the chances of acne breakouts reduce to a larger extent.
Can I use a banana fruit facial at home?
A banana fruit facial at home is best if you have dry skin. With the goodness of moisturizer, banana also helps to reduce wrinkles, brightens skin, and reduces itching. Therefore, if you are searching for a perfect fruit facial for dry skin, use a banana. Additionally, add honey to it. This will give an extra glow to dry skin.
Read Also:
- All You Need To Know How To Apply Sunscreen
- Best Matrix Hair Care Products: Top 10 in Our List
- How to Apply Lipstick Perfectly – 5 Easy Steps
- Best Anti Dandruff Shampoo in India: The Top 10 Ones
The End Note
Now that you know how to do a fruit facial at home, you do not have to depend on your parlor or make a separate schedule to go to the parlor. Fruits are always loaded with goodness for health. Besides, they are safe on the skin. We are sure, after looking at your glowing skin, you will thank yourself and feel good from inside.
However, always remember the dos and don’ts. Also, make sure you are not allergic to some fruits. We never recommend the fruit to use on skin to which you are allergic. In case you find any adverse condition, immediately seek the help of your doctor.
A fruit facial at home lasts for approximately 72 hours. So, if you have any occasion or party within a day or two, try one DIY facial today to perceive the enhancement in skin tone, texture, and glow.
Table of Contents
